The Build
Building a PC may seem like a daunting task at first, but as many enthusiasts will tell you, it can be very rewarding.
Now that you've got your hands on all the parts you'll need, the real fun begins. Follow this guide to get your PC up and running.
Now that you've got your hands on all the parts you'll need, the real fun begins. Follow this guide to get your PC up and running.
Before You Build
Make sure that you are working on a non-conductive surface to avoid shorting out your components.
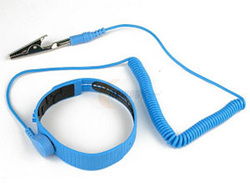
It is also a good idea to use an anti-static wrist strap to ground yourself so that you don't damage anything through static electricity

You are going to need a phillips-head screwdriver so make sure you have one on hand.
CPU

Locate the CPU socket on the motherboard

Push down on the tension arm and slide it to the side and lift up to release the locking mechanism.
Remove the plastic protective cover.
(Do not touch the pins or the contacts on the CPU or motherboard)
Remove the plastic protective cover.
(Do not touch the pins or the contacts on the CPU or motherboard)

On one corner of the CPU there is a small triangle and there is a corresponding triangle on the motherboard at one corner of the CPU socket. Place the CPU in the socket with these two triangles together by dropping it in the socket. (Do not push down on the CPU or apply pressure to it)

Close the socket by locking the tension arm back into place.
CPU Heatsink

Stock heatsinks these days come with pre-applied thermal paste you most likely won't need to worry about applying any.
If yours does not have thermal paste pre-applied you will need to add a small dab (about the size of a grain of rice) to the center of your CPU before installing the heatsink.
(Thermal paste is very important as it helps transfer heat from the CPU to the heatsink to dissipate it)
If yours does not have thermal paste pre-applied you will need to add a small dab (about the size of a grain of rice) to the center of your CPU before installing the heatsink.
(Thermal paste is very important as it helps transfer heat from the CPU to the heatsink to dissipate it)

Before attaching the heatsink to the CPU, locate the fan connector near the CPU socket most often labeled "CPU FAN" (it can either be a 3 or 4 pin connector) and make sure that you orientate the heatsink so that the fan cable can reach it without strain or getting caught in the fan itself.
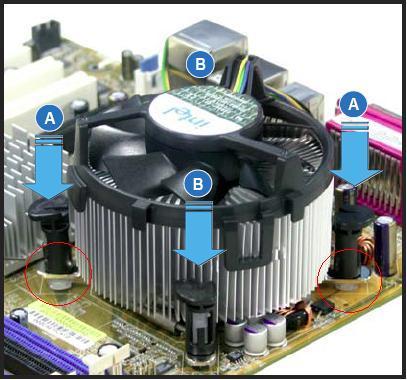
For Intel heatsinks line the 4 push-pins (labeled A and B) up with the 4 holes around the CPU socket.
Push down on opposite corners until you hear a click.
(Push down both A's together and then both B's together)
Push down on opposite corners until you hear a click.
(Push down both A's together and then both B's together)

For AMD heatsinks align the clips on the heatsink with the anchors on the retention frame around the CPU socket.
Rest the clips over the anchors.
Turn the lever until both sides of the clip are secured.
(This may take some force)
Rest the clips over the anchors.
Turn the lever until both sides of the clip are secured.
(This may take some force)
Memory (RAM)
Locate the Dimm slots on the motherboard.
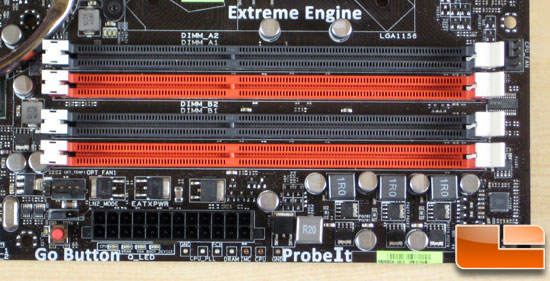
(If you won’t be filling all the dimm slots with memory then refer to your motherboard manual to see which slots you should use.)
Push back on the two clips on the slots you will be using.
Push back on the two clips on the slots you will be using.

Align the notch on the RAM stick with the notch inside the slot.
Push down firmly on both ends of the RAM stick until the two clips snap into place.
Push down firmly on both ends of the RAM stick until the two clips snap into place.
Motherboard

Grab the input/output (i/o) shield that came with your motherboard.

Before installing the i/o shield make sure it is orientated so that it will line up with the inputs and outputs on the motherboard.

From inside the computer case, snap the i/o shield into place. (This might require some slight pressure)

Grab the motherboard stand-offs and screw them into the case making they will line up with the screw holes in your motherboard.
(Different size motherboards will require the standoffs to be placed in different spots. Refer to your case manual to determine where to put them)
(Different size motherboards will require the standoffs to be placed in different spots. Refer to your case manual to determine where to put them)

Put the motherboard in the case making sure the inputs/outputs match up with the i/o shield and the stand-offs line up with the screw holes in the motherboard. Screw the motherboard into the stand-offs.
Graphics Card
Locate the PCI slots on the motherboard.

Remove the expansion slot plates on the back of the computer case that line up with where you are installing your GPU. (Some cards require you to remove one others require you to remove two)

Insert the GPU into the PCI slot and press it in.
Screw the GPU into the expansion slots inside of the back your computer case.
Screw the GPU into the expansion slots inside of the back your computer case.
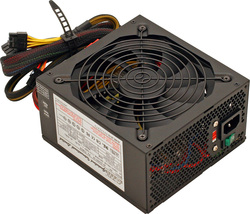
Power Supply
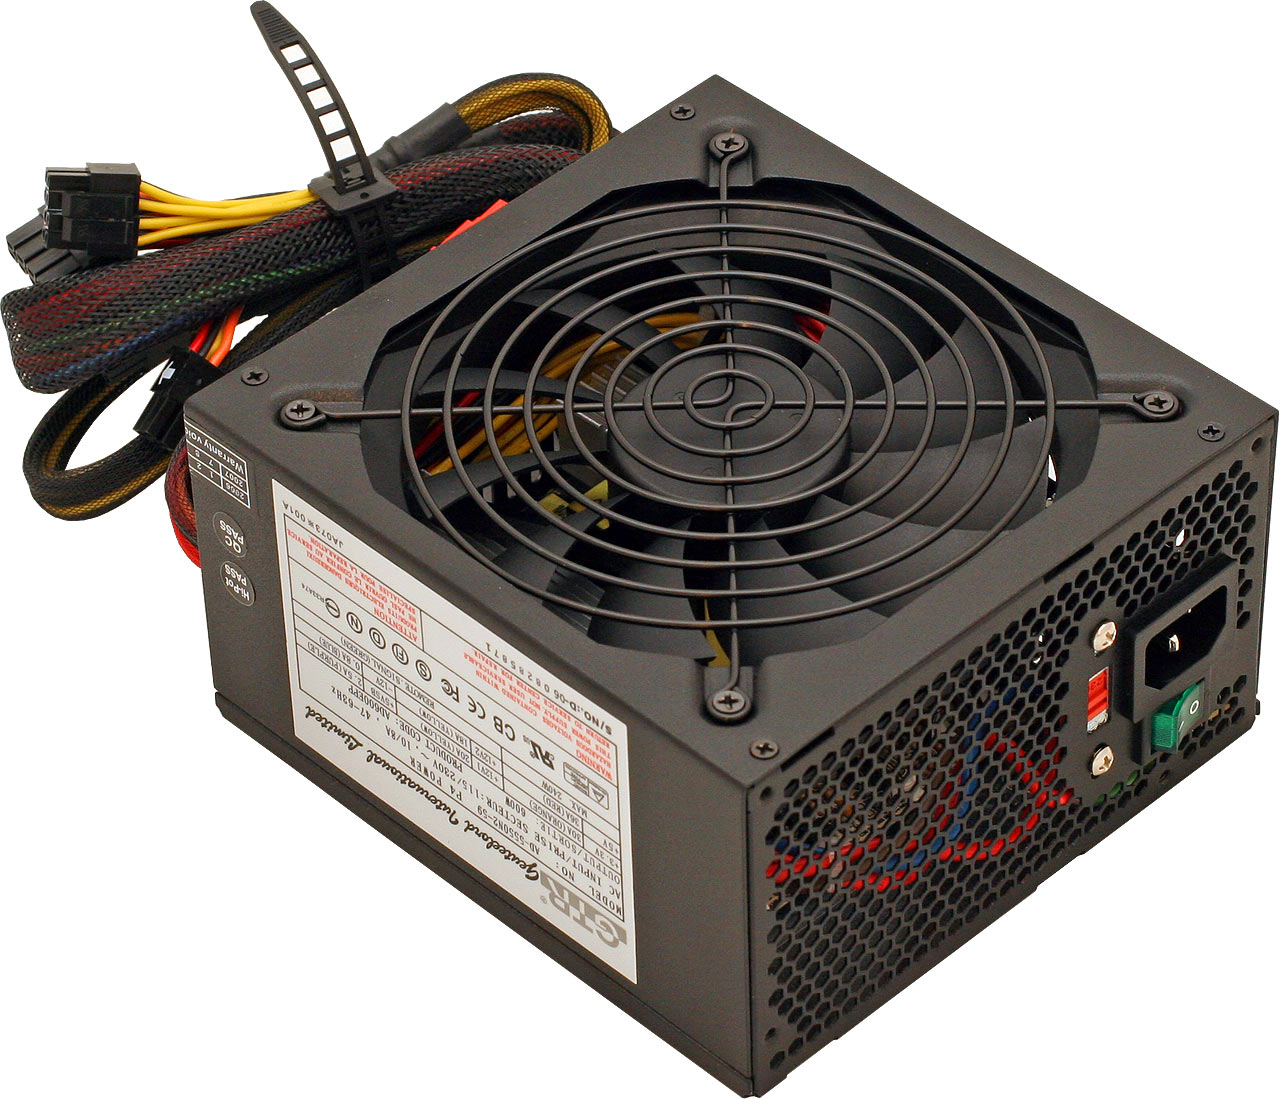
Place the PSU in the case.
(Can be placed with fan facing up or down. If the computer case will be on the floor in thick carpet it is suggested to have the fan facing up so it wont struggle to intake air)
(Can be placed with fan facing up or down. If the computer case will be on the floor in thick carpet it is suggested to have the fan facing up so it wont struggle to intake air)

Screw the PSU into the back of the case.
Storage

Depending on your case hard drives can be installed either by screwing into the drive bay or they are snapped into rails and slid into the drive bay and snap in.

Optical Drive

Remove the optical drive cover located in the front of your case.
Slide the optical drive into the case from the front.
(Depending on your case it will either snap in or you will need to screw it in)
Slide the optical drive into the case from the front.
(Depending on your case it will either snap in or you will need to screw it in)
Plugging It All In
Because not all motherboards are the same, the location of where cables are plugged in will be slightly different.
You should refer to your motherboard manual for clarification.
You should refer to your motherboard manual for clarification.

The motherboard will require either a 20 or 24 pin power connector which is usually located along the right side of the board.
Plug in the 20/24 pin connector from the power supply to the motherboard.
Plug in the 20/24 pin connector from the power supply to the motherboard.
The CPU will require either a 4-pin or an 8-pin power connector which will be plugged in from the power supply to the motherboard, usually located in the top left corner.

USB cables from the computer case will plug into the 9 pin headers usually located along the bottom of the motherboard.
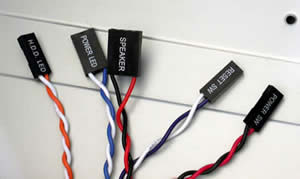
Case power/reset/LED indicator cables plug in idividually but are grouped together, usually at the bottom right of the motherboard.
(Refer to the motherboard manual to find out the correct way to orientate them)
(Refer to the motherboard manual to find out the correct way to orientate them)

Case fan headers are generally spread throughout the motherboard so you will need to refer to your motherboard manual to locate them or look on your motherboard for 3 or 4 pin headers labeled FAN.

Optical drives and storage drives both require two cables, power and SATA.
(first image power, second image SATA)
Plug the power cables from the power supply to the optical drive and storage drives.
(first image power, second image SATA)
Plug the power cables from the power supply to the optical drive and storage drives.

Plug each SATA cable running from each optical drive and storage drive to the SATA plugs on the motherboard, usually located along the right side below the 20/24 power connector.

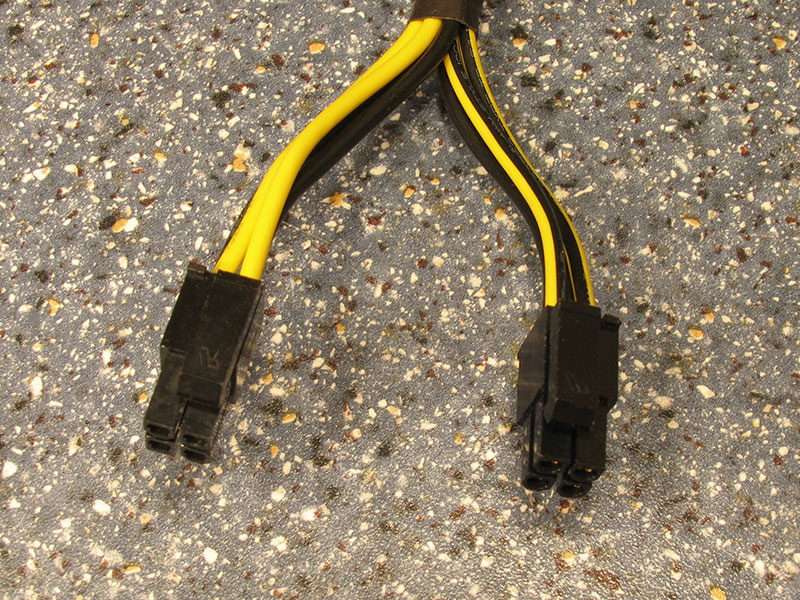
Depending on what graphics card you have, you might need to plug in either 2 6-pin connectors or a 6-pin and an 8-pin connectors from the power supply to the graphics card.
Connect the power cable to the back of the PC located on the back of the power supply you already installed. Connect the other end of the power cable to your average wall socket or for added protection a surge protector. Flip the switch located on the power supply to on.

Now cross your fingers and hit the power button on your case. If the computer doesn't turn on go back through the steps provided and make sure they are all completed correctly. If it still won't start check the troubleshooting guides provided with the parts you purchased. If you still have problems after that you may have a faulty part that should be returned and replaced with a working one.
The Software

Insert the windows installation disk that you purchased and start the restart the computer. The on-screen guide should walk you through the operating system installation.

After you have finished installing your operating system, you will need to install the drivers to run your parts. First locate the driver disc located with your motherboard and follow the on-screen instructions for installation. Then located the drivers disc with the video card and do the same. Updated versions of these drivers can be found on the manufacturers website after these are installed.
Enjoy!
Congratulations you have just constructed your own working desktop computer. With proper care you can use this computer for years to come. When it comes time to upgrade, all you'll have to do is buy new parts and swap out the old ones. The only final step is to revel in the greatness you have just created and enjoy it for the wonder that it is.
